

User guide3 min
Put your own brand on the reports
Reports in the workspace sidebar is a branding form, not a list of documents. Set a logo, three colours and a cover note here, and every report this workspace exports uses them.
Looking for the documents themselves?
Reports belong to a scan, so they are on the site. The site's Reports screen is where you download a PDF or a dataset.
How to get there#
Workspace sidebar, under Workspace alerts.
- 1
Close any open site
Click the mark, top left, or All sites in the site picker.
- 2
Choose Reports in the sidebar
Between Workspace alerts and Settings.
app.pixyscan.com/w/…/reports
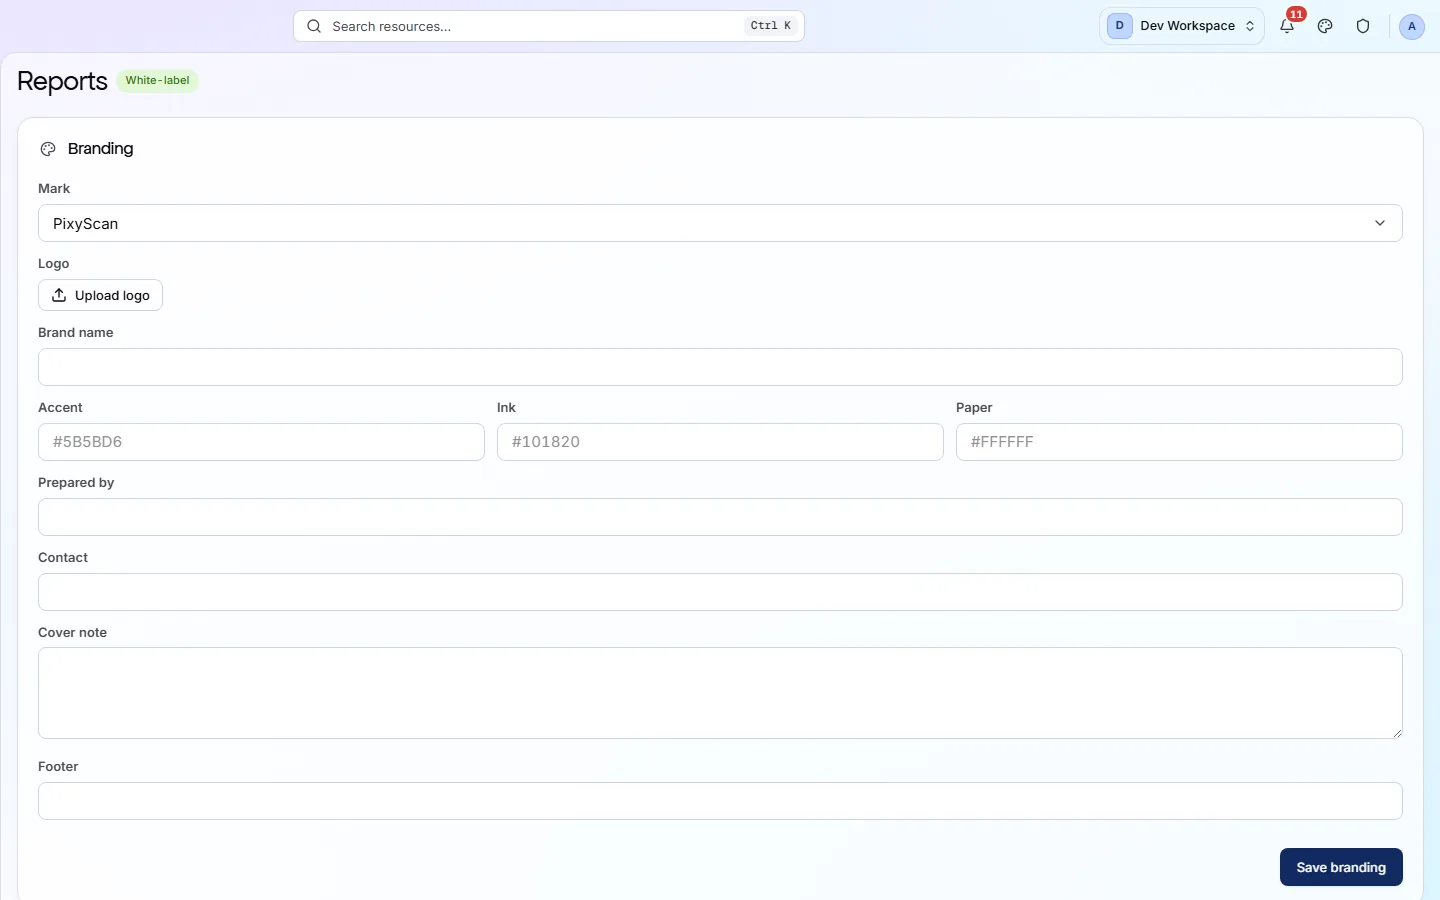
What each field does#
All of it optional.
| Field | Default | What it does |
|---|---|---|
| Mark | PixyScan | Which logo sits at the top of a document: ours, yours, or none. |
| Logo | — | Your own image, used when Mark is set to your brand. |
| Brand name | PixyScan | The name printed beside the mark. |
| Accent | #5B5BD6 | The colour used for emphasis: headings, bars and rules. |
| Ink | #101820 | Body text. |
| Paper | #FFFFFF | The page behind it. |
| Prepared by | — | Who the report is from - usually an agency name. |
| Contact | — | How to reach whoever prepared it. |
| Cover note | — | A paragraph on the first page, for explaining what you looked at and why. |
| Footer | — | A line on every page, such as a confidentiality notice. |
Set it once, before your first client report
Branding is applied when a report is exported, so it also applies to scans that finished before you set it. You do not need to rescan.
If the product does not match this page, the page is wrong and we would like to know. Tell us